How to Upgrade Your Audi Q5 Screen with a Plug-and-Play Kit

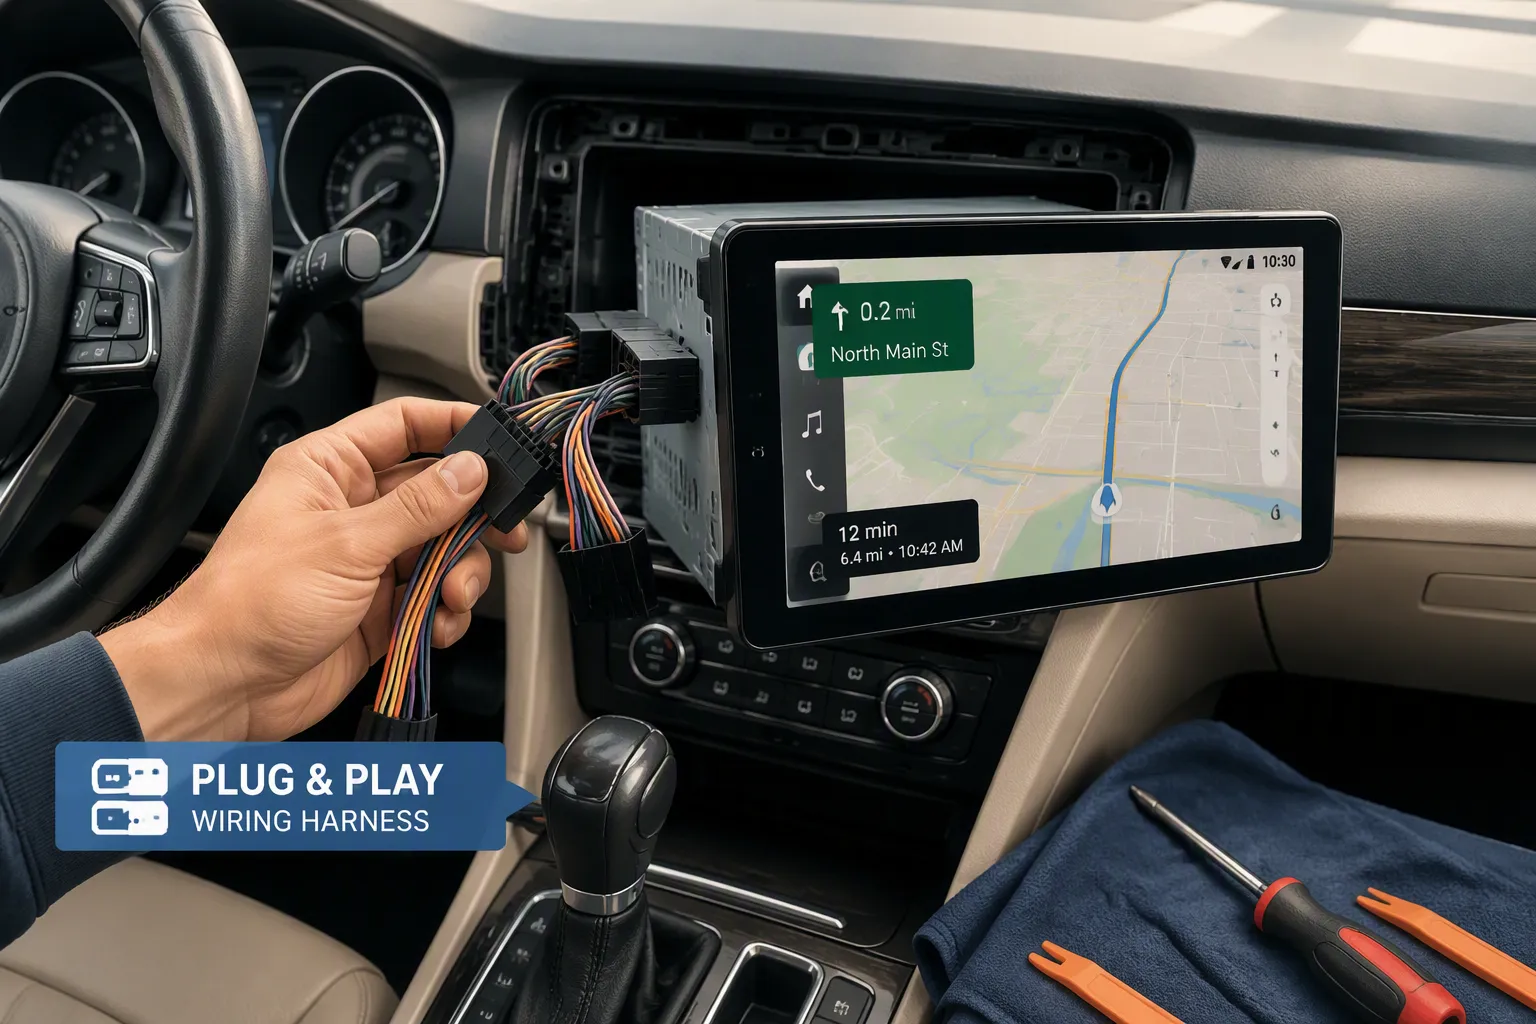
Yes, you can upgrade your Audi Q5 screen with a plug-and-play kit. This straightforward DIY project replaces your outdated factory display with a modern 8.9-inch Linux touchscreen. The new screen adds wireless CarPlay and Android Auto. You gain navigation, hands-free calls, and music apps on a sharp HD display.
The kit uses your original car cables. You do not need to cut or splice any wires. All factory functions remain intact, including the radio, amplifier, and rearview camera. This audi q5 screen upgrade works for the 2009-2017 audi q5 with MMI 2G. You simply swap the old screen for a new Linux-based head unit. The guide covers kit details, installation steps, compatibility checks, and AUX verification.
Key Takeaways
Check your Audi Q5 has MMI 2G system and is from 2009-2017.
Install the new screen without cutting any wires.
Enjoy wireless CarPlay, Android Auto, and a sharp HD display.
Keep your factory radio, amplifier, and rearview camera working.
Verify your AUX input before you order the kit.
What Is a Plug-and-Play Kit?
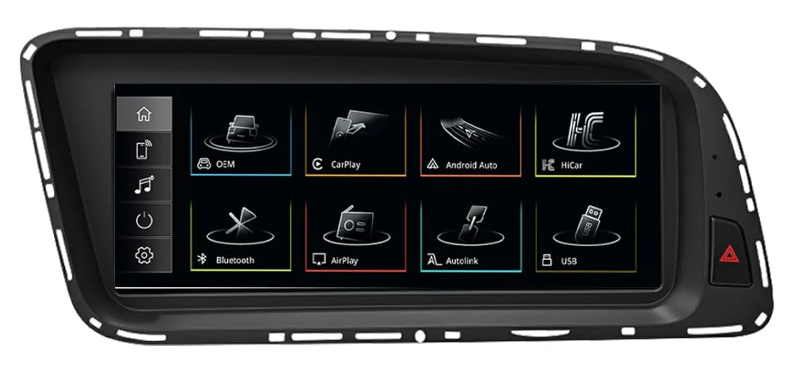
This kit is an 8.9-inch Linux touchscreen built for the Audi Q5 2009-2017 with the MMI 2G system. It brings wireless and wired Apple CarPlay and Android Auto to your dashboard. You also get AirPlay and AutoLink support. The screen starts up in 6 to 11 seconds and connects to your phone automatically. Think of it as a modern Linux-based head unit that keeps your car's original personality intact.
Kit Components and Factory Fit
The package includes the 8.9-inch touchscreen, a custom wiring harness, and every cable you need. The harness uses OEM-compatible connectors that plug straight into your car's existing wiring. You never cut, splice, or solder a single wire.
No cutting! No splicing! This wiring harness kit plugs into existing factory wiring on your vehicle.
The table below shows what connects where.
Component | Details |
|---|---|
Screen cables | 2 white plugs |
Power adapter plugs | Plug 1, 2, 3, 4 |
LVDS plug | 10-pin square for 2G system |
USB cable | For USB flash drive music and video |
AMI-AUX adapter cable | Optional; only for cars with a 30-pin AMI connector |
Key Benefits Over the Stock Screen
The display delivers 1920x720 HD resolution. Your factory audi navigation system maps, music apps, and videos all look sharp and colorful. The Linux operating system avoids app sprawl and background processes. You get fewer crashes, faster wake-up cycles, and stable performance over long periods. Standby drain stays low too.
This Linux-based head unit also retains your factory radio, amplifier, joystick control, and OEM rearview camera. Steering wheel controls and the iDrive controller keep working. The kit supports Audi Concert and Symphony systems. It does not work with Audi Multimedia. An audi q5 screen upgrade like this one preserves your car's original feel while adding modern connectivity.
Step-by-Step Installation Guide
You need a pry tool, a set of screwdrivers, and trim removal tools. These step by step installation instructions assume you work slowly and check every connection. Disconnect the negative battery terminal first. This prevents electrical issues while you work on the audi q5 screen upgrade.
Always disconnect the battery before you start. Live wires can spark or damage the new Linux-based head unit.
Removing the Factory Screen and Trim
Start by removing the central air conditioning vents. Gently pry the trim strip around them with your trim removal tool. Work from the edges inward. The clips release with light pressure. Next, detach the frame around the factory screen. Insert the pry tool behind the frame and lift it away. You can now remove factory screen mounting screws. Keep the screws in a cup so you do not lose them. Pull the old screen unit forward and unplug its connectors. Set the factory screen aside.
Connecting Cables and Reinstalling
Connect all included cables to the main unit. Place the main unit in the glove box or inside the dashboard. If you choose the glove box, first run the screen cables from the glove box to the dashboard behind the screen. Connect the new touchscreen using the 2 white plugs at its back. The other ends go to the main unit.
Now connect the remaining plugs. The red, white, and blue connectors are different shapes. Match each one carefully. This step matters most. If you feel unsure where a cable goes, contact the seller and send pictures.
Connect the power adapter plugs. Plug 1 connects the factory power wiring harness that was previously connected to the back of the radio. Plug 2 connects to the back of the radio or CD player. Plug 3 and plug 4 connect with the cables behind the climate control panel. Unplug those cables first, then join plug 3 and plug 4 with them. For premium models of the Audi Q5, A4, and A5, the gateway plugs sit in the glove box instead. Remove the glove box and check there if the plugs behind the climate control panel look different.
Connect the LVDS plug next. The 10-pin square plug fits the MMI 2G system. Premium models may use a round 4-pin LVDS plug. Your kit ships with the correct plug once you confirm your car's version.
Turn on the car and test the screen unit. Check CarPlay, Android Auto, the radio, and the rearview camera. If a question comes up, contact the seller through WhatsApp. Technicians reply within 24 hours.
When everything works, install back the climate control, CD player, new touchscreen, frame, and trim. Reassembly is easy after you already know how to remove factory screen parts. These step by step installation instructions keep the job non-destructive from start to finish.
Will It Fit Your 2009-2015 Audi Q5?
This kit fits the 2009-2017 Audi Q5 with the MMI 2G system. That covers the 2009-2017 model years.
Before you order, confirm your MMI version. You need MMI 2G for this upgrade to work.
LVDS Plug and Model Years
The LVDS plug connects your new screen to your car's video signal. This plug changes between MMI generations. MMI 2G systems use a square 10-pin LVDS connector. Some premium models use a round 4-pin plug instead.
You can check your LVDS plug before you buy. Pop out your factory screen and look at the connector. A square plug with 10 pins means you have MMI 2G. If you see a round 4-pin plug, you still have MMI 2G but need the correct adapter. The kit ships with the right plug once you confirm your version. Send a picture to the seller if you are unsure.
The table below shows the two plug types.
Plug Type | Shape | Pin Count | MMI System |
|---|---|---|---|
Standard MMI 2G | Square | 10 pins | MMI 2G |
MMI 2G (Premium) | Round | 4 pins | MMI 2G (Premium) |
Either way, the kit works with your 2009-2017 audi q5 as long as you have the correct wiring.
MMI 2G and Concert/Symphony Notes
How do you confirm you have MMI 2G? Follow these steps on your Audi MMI controller.
Press the CAR button.
Press SETUP or MENU depending on your system.
Select the Version submenu.
Look for a line marked SW. If the software version matches a pattern like SW: XX-XX XX.X.X XXXX, you have MMI 2G.
If your screen does not show that pattern, you likely have a different MMI generation. The kit will not work with MMI 3G Low, MMI 3G Basic, or MMI 3G High.
The kit supports Audi Concert and Symphony systems. These are the standard audio systems on most Q5 models. They represent the 2G versions of Audi's factory radios.
The 2G models with the 6.5-inch screen have a different connector than the higher 3G models. The Concert and Symphony systems use the 2G connector. Higher spec units communicate differently. Only the Concert or Symphony stereo allows this upgrade. You also need an upgraded trim to fit a larger screen.
This is a critical point. The 2009-2015 audi q5 usually comes with Concert or Symphony. But some models have the factory Audi Multimedia system instead. That system requires a different solution. Check your stereo type in the MMI menu before ordering.
This audi q5 screen upgrade replaces your factory display with a modern Linux-based head unit. It keeps your factory radio and amplifier intact. The new screen connects directly to your car's original wiring. You make no software changes to your vehicle's control units. The installation remains fully reversible.
One more note about the physical fit. The kit includes an 8.9-inch screen. Your factory display is 6.5 inches. The new trim included in the kit fills the extra space around the screen. This ensures a clean, factory-like appearance after installation.
If you are unsure about your system, take a photo of your current screen setup. Send it to the seller. They can confirm compatibility before you purchase. This simple step saves time and avoids the hassle of returns.
Verifying AUX and Adapter Needs
Before you install your new Linux-based head unit, check how your Q5 handles AUX audio. The kit needs a working AUX input to pass sound from the new screen to your factory amplifier. Many Q5 models have this input. You just need to find it.
Checking AUX in Glovebox or MMI
Open your glovebox and look for a small 3.5mm round port. Audi placed this port in the glovebox on many Q5 models. If you see it, your car has AUX ready to go. You can also check the MMI menu. Press the MEDIA button on your center console. Look for an AUX option in the source list. If AUX appears there, your system supports it.
Some cars hide the AUX port behind a small cover. Others place it near the center console armrest. Check both spots if the glovebox comes up empty. You can also look at your factory radio unit. The Concert and Symphony radios often have an AUX input on the back. A quick look behind the radio confirms this.
When an Extra Adapter Is Needed
Your kit includes the main cables and wiring harness. But some model years need an extra adapter for audio input. If your Q5 lacks an AUX port, you may need an additional harness. This adapter connects your new screen's audio output to the factory amplifier. Without it, you get video but no sound through the car speakers.
Confirm your AUX setup before you order. This simple check avoids extra parts and delays.
Cars with the 30-pin AMI connector in the glovebox need a different approach. The kit offers an optional AMI-AUX adapter cable for this case. This cable converts the AMI signal to a standard AUX input. Check your glovebox for a rectangular 30-pin connector. If you see one, order the AMI-AUX adapter with your kit.
Some early Q5 models may lack a factory AUX port, while later models usually include it. Take a photo of your glovebox and radio area. Send it to the seller before you buy. They confirm your exact needs and ship the right parts. This step takes five minutes and saves you a second installation.
You now have a clear path to a modern cockpit. First, confirm your Q5 has the MMI 2G system and falls within the 2009-2017 range. Next, gather your pry tool, screwdrivers, and trim removal tools. Then follow the plug-and-play instructions step by step. This audi q5 screen upgrade transforms your dashboard with wireless CarPlay, Android Auto, and a sharp 1920x720 HD display. Your factory radio, amplifier, and rearview camera keep working. The Linux-based head unit installs without cutting any wires. The process is fully reversible. So go ahead with confidence. Enjoy your connected Audi Q5.
FAQ
Will this kit work with my factory rearview camera?
Yes. The kit retains the OEM rearview camera. You do not need to replace or modify it. The camera continues to display on the new screen automatically when you shift into reverse.
Do I need to cut any wires during installation?
No. The kit uses original car cables. You plug the new wiring harness directly into factory connectors. You never cut, splice, or solder any wire.
Can I switch back to my original screen?
Yes. The installation is fully reversible. You remove the new screen and reconnect the factory unit. All original cables remain untouched.
Does the kit support steering wheel controls?
Yes. The kit keeps your factory steering wheel controls working. You can still change volume, skip tracks, and answer calls from the wheel.
What if my Q5 has the Bang & Olufsen sound system?
The kit works with the factory amplifier. You continue to enjoy premium sound through the new screen.
See Also
2026 Model Audi A3 Screen Upgrade Guide From Leadsign
Leadsign CarPlay Retrofit For Audi A5 MMI 2G 2009-2015
Leadsign CarPlay Screen For Any Car Display Upgrade
Leadsign Consistently Delivers Top Audi A4 B8 Apple CarPlay Upgrade
Upgrade Your BMW Interface With Leadsign Wireless CarPlay Retrofit